Column Composer Showcase Tutorial 01
Learn to build this Showcase page from the ground up
What you'll learn
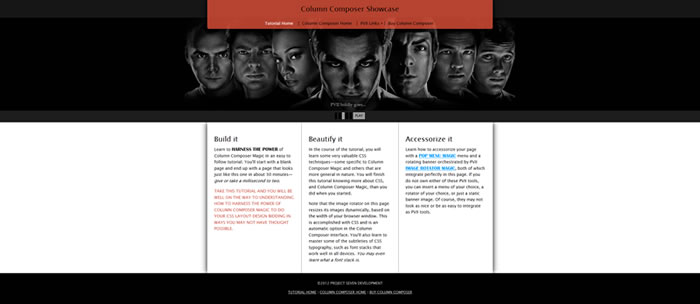
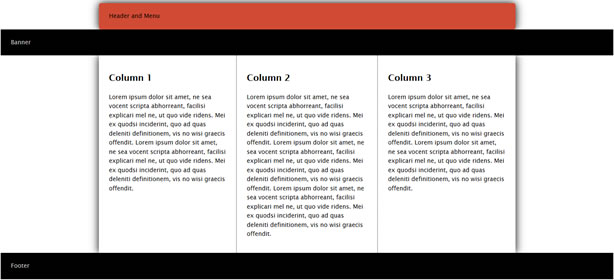
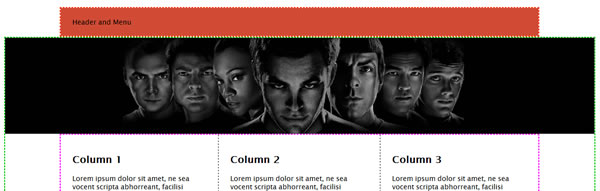
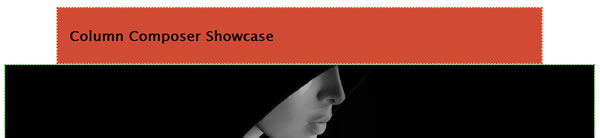
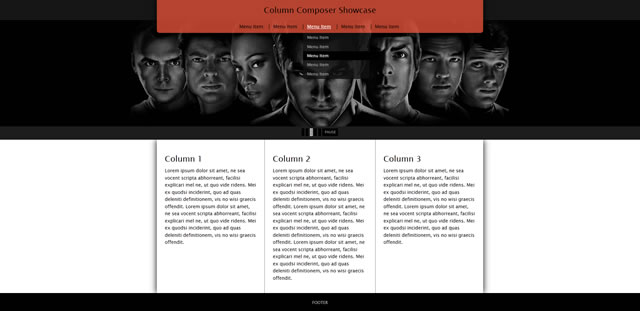
Learn to Harness the power of Column Composer Magic in an easy to follow tutorial. You will be well on the way to understanding how to harness the power of Column Composer Magic to do your CSS layout design bidding in ways you may not have thought possible. You'll start with a blank page and in about 30 minutes, end up with a page that looks just like this one:
Download the Work Files
We've prepared a folder containing a starter page, CSS file, and images folder. You will use these files to create the CCM Showcase page.
Download the Tutorial Work Files
The folder you download is named p7showcase01.zip
Unzip the folder to your defined Dreamweaver local site. Inside you will find workpage.htm, lorem.htm, p7showcase01.css, and an images folder.
Work with the latest PVII extension version
Before you begin, make sure you have installed the latest version of Column Composer Magic. If you want to include the optional Pop Menu Magic and Image Rotator Magic widgets on your page, please check those version numbers as well. Open Adobe Extension Manager and compare the version number of your installed extension(s) against the version numbers listed on our updates page. Update your products if one is available.
Create the Main Structural Elements
Open the workpage.htm file in Dreamweaver. Click once on the page to establish your insertion point.
Open the CCM Interface by clicking its Insert Bar/Panel icon ![]() or choosing:
or choosing:
Insert > Studio VII > Column Composer Magic
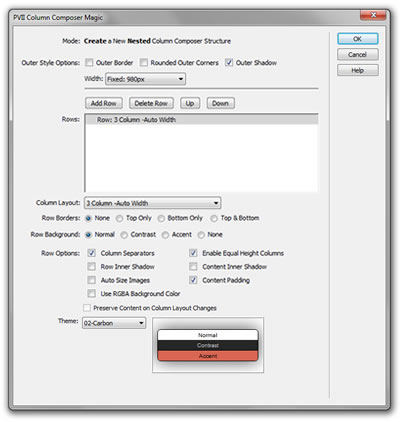
For Outer Style Options, deselect Outer Border and Rounded Outer Corners. Keep Outer Shadow selected.
For Width, choose Fixed: 980px
Leave Column Layout and Row Borders set to their default values
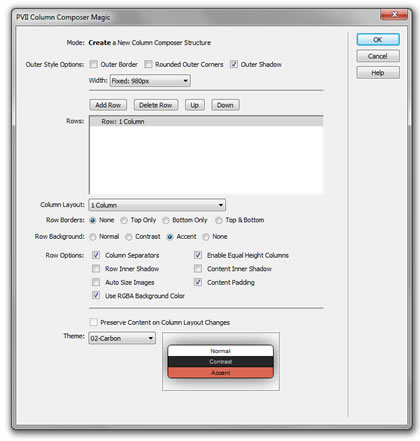
Set Row Background to Accent
In Row Options place a check mark next to Use RGBA Background Color
Leave all other Row Options set to default
Set Theme to 02-Carbon
Click OK and your page's first CCM structure will appear:
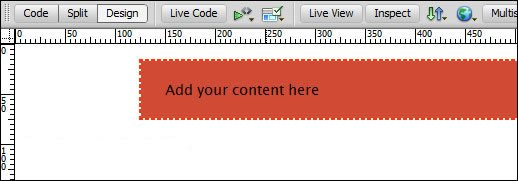
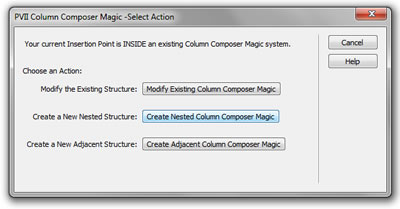
Now place your cursor inside the first structure.
Open the CCM interface.
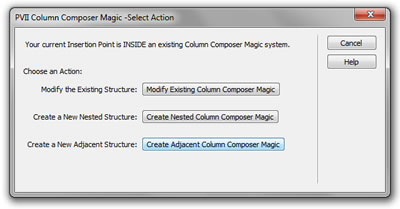
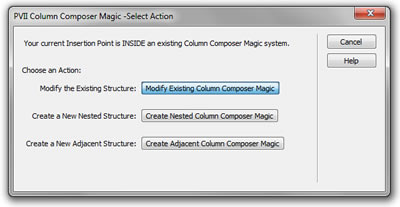
Click Create Adjacent Column Composer Magic
The main UI will open
Deselect all 3 Outer Style Options
Leave Width set to Auto
Click the Add Row button twice so you have a total of 3 rows listed in the Rows box
Select the first row and set its Row Background to Contrast
Leave the second row's Row Background set to Normal
Select the third row and set its Row Background to Contrast
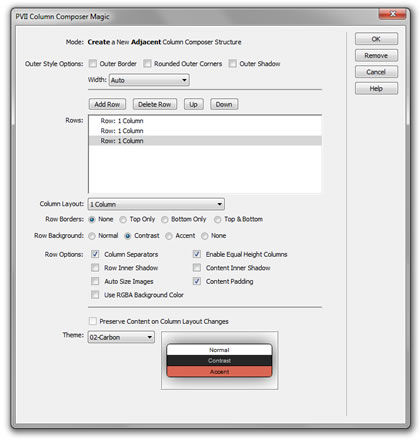
Select Theme 02-Carbon
Leave all other options default.
Click OK
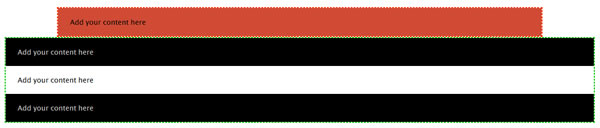
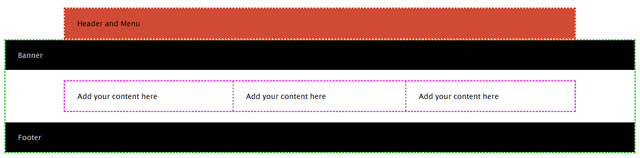
Your main structure is now built.
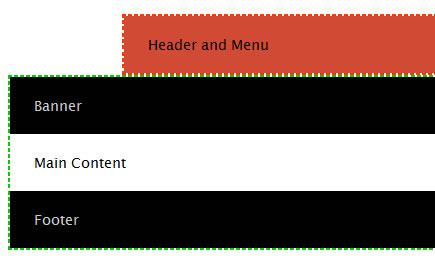
Label all rows to orient yourself
Let's quickly assign labels to all 4 rows on your page, replacing the default "Add your content here" boilerplate text, so we know what goes where. Label your rows as shown below:
Create the 3-column main content structure
Inside the row that is labeled Main Content, we will nest a new 3-column CCM structure. Place your cursor at the end of the words Main Content and press your backspace key until both words are removed.
Open the CCM interface
Click the Create Nested Column Composer Magic button
The main CCM interface will open
For Outer Style Options, select only Outer Shadow
For Width, select Fixed: 980px
For Column Layout select 3 Column - Auto Width
Set Theme to 02-Carbon
Leave all other setting default
Click OK
Remove the padding from around the main content row
The main content structure is nested inside the second row of its parent structure, which has padding assigned. Let's remove that padding. Place your cursor inside the Banner row.
Open the CCM interface
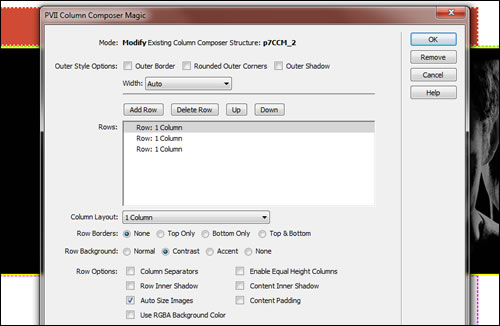
Click the Modify Existing Column Composer Magic button
The main CCM interface will open
On the Mode line you should see Modify Existing Column Composer Structure: p7CCM_2
Select the second row in the Rows list
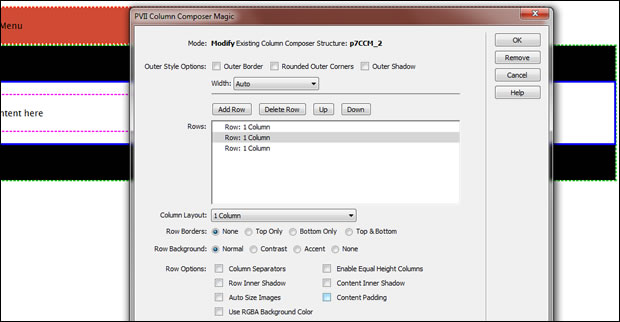
In the Row Options section, uncheck the Content Padding option
Click OK
Add some headings and content to the 3 columns
Edit the placeholder text in each column to Column 1, Column 2, and Column 3 and use your Property Inspector to set each to a Heading 2. Ad some boilerplate text below each heading. If you do not have a sample text generator, open the lorem.htm file in your work folder and copy some the text. Add a couple of extra lines in the middle column so you can see how nicely the Equal Heights Column feature works.
Preview in a browser
It's starting to take shape nicely.
Add a banner image or a banner rotator
If you do not have PVII Image Rotator Magic, you will insert a single static banner image in the Banner row. If you have Image Rotator Magic, skip to step 2.
1. Static banner image
Place your cursor inside the Banner row and backspace over the word Banner until it is gone.
Choose Insert > Image
Browse to the images folder inside your P7CCM-Showcase-01 folder.
Select any of the 5 images
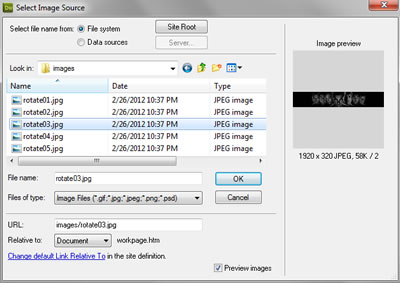
Click OK
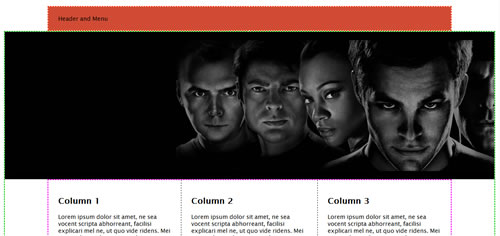
The image is much wider than the layout. Let's fix that.
Gently click the banner image once to select it. Then open the CCM interface.
Click the Modify Existing Column Composer Magic button.
The main interface will open.
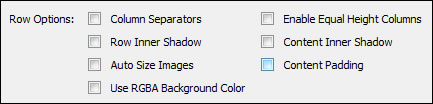
In the Row Options section, place a check mark next to Auto Size Images and remove the check mark next to Content Padding.
Click OK
That's a lot better...
2. Image Rotator Magic Banner
If you do not have Image Rotator Magic, skip to the next section.
Place your cursor inside the Banner row and backspace over the word Banner until it is gone.
Click the Image rotator Magic icon ![]() on your Insert Bar or Panel, or choose
on your Insert Bar or Panel, or choose
Insert > Studio VII > Image Rotator Magic
Click the Add button 4 times to create a total of 5 New Image entries. Select the first New Image and click the Browse... button next to the Image Path box.
Browse to the images folder inside your P7CCM-Showcase-01 folder.
Select the first image
Repeat to assign each New Image to one of the images in your P7CCM-Showcase-01/images folder
Enter an optional Description for one or images if you want
For Controls select (check) Paginator and Pause/Play, then choose Below Image
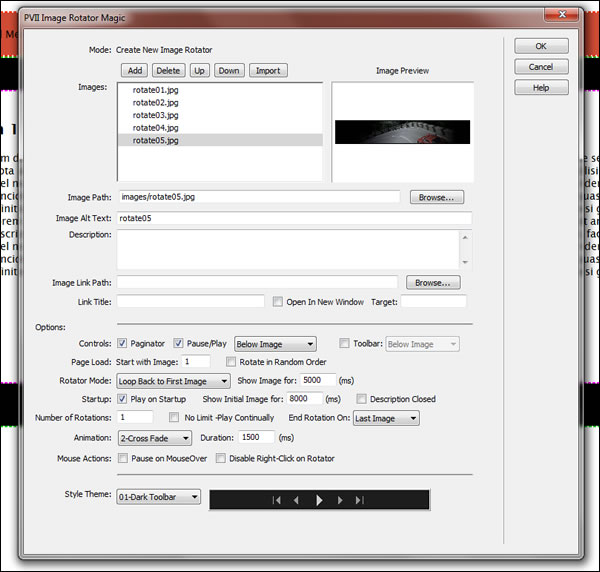
Uncheck the No Limit - Play Continually option and set Number of Rotations to 1
Leave all other options set to their default values
Click OK
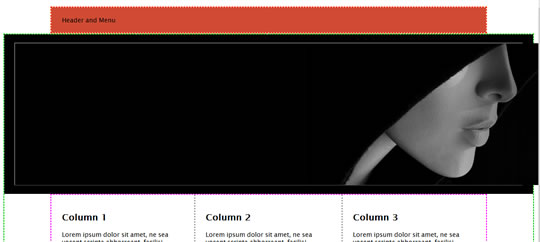
The image is too wide for the page and there is still padding assigned to the row. Let's fix that.
Gently click the banner image once to select it. Then open the CCM interface.
Click the Modify Existing Column Composer Magic button.
The main interface will open.
In the Row Options section, place a check mark next to Auto Size Images and remove the check mark next to Content Padding.
Click OK
That's a lot better. Go ahead and preview the page in a browser.
Outstanding!
Create a header
Place your cursor in the row labeled Header and Menu
Change the text to Column Composer Showcase and use Dreamweaver's Property Inspector to set it to a Heading 1
Tip: Don't worry about styles or font sizes. That will all be handled a little later.
Create a menu
If you do not have PVII Pop Menu Magic 2, you will insert a static menu below the header. If you have Pop Menu Magic 2, skip to step 2.
1. Static Menu
Open the lorem.htm file in your P7CCM-Showcase-01 folder and you will find a row of links. Copy it to your clipboard.
Place your cursor just to the right of the Column Composer Showcase heading and press enter to create a new paragraph. Paste the links you copied from the lorem.htm file.

Tip: Don't worry about styles or link colors. That will all be handled a little later when we link the Showcase CSS file to the page.
2. Create a Pop Menu Magic 2 Menu
Place your cursor just to the right of the Column Composer Showcase heading. Then press the right arrow key on your keyboard one time to make sure your insertion point is next to, but not inside of, the heading tag.
Open the Pop Menu Magic 2 interface by clicking its icon ![]() on your Insert Bar or Panel, or choose:
on your Insert Bar or Panel, or choose:
Insert > Studio VII > Pop Menu Magic 2
The PMM2 interface will open
Add 4 or 5 root menu items and add a Sub-Menu to one or two of the root items
For Menu Type, choose Horizontal
For Horizontal Options, place a check mark next to Auto Center
Choose Style Theme 09-Pipes
Leave all other options set to their default values
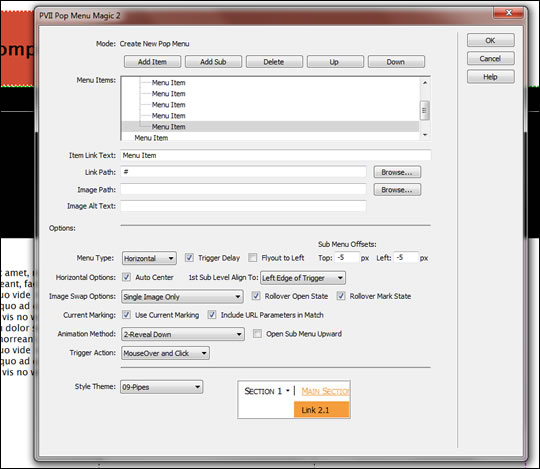
Click OK and preview in a browser

Don't worry about the colors. Those are carried in the included p7showcase01.css file that we'll link to your page in a moment.
Assigning a class to the Header
Place your cursor inside the heading 1 text Column Composer Magic and switch to Code View
<h1>Column Composer Showcase</h1>
Assign a class of main to the h1 tag:
<h1 class="main">Column Composer Showcase</h1>
Switch back to Design View
Removing padding from the header row
The header row padding can now be removed.
Place your cursor inside the header text Column Composer Showcase
Open the CCM interface
Click the Modify Existing Column Composer Magic button
The main interface will open
Clear the check mark next to Content Padding
Click OK
Assigning an ID to the footer row
Place your cursor inside the footer row text and switch to Code View. You will find the footer row's content DIV:
<div class="p7ccm02-1col-column1-cnt p7ccm02-content">Footer</div>
Assign an ID of footer to the DIV tag:
<div id="footer" class="p7ccm02-1col-column1-cnt p7ccm02-content">Footer</div>
the Showcase CSS file
Now we're ready to add the final touch. We'll link the p7showcase01.css file to the page. Up until now, we've relied on the default CCM style sheet. Like most CSS frameworks, Column Composer CSS files are core CSS files—and seldom need to be edited. One of the more powerful features of Column Composer Magic is that it is programmed to support user-assigned classes and IDs. The classes we've assigned in this tutorial, such as class="main" to the main heading and id="footer" to the footer content DIV, are perfect examples.
The p7showcase01.css file also contains a few special rules that seamlessly integrate the PMM2 menu or style the static menu links. The CSS file is heavily commented so it would be a good extra exercise for you to read through it when you've got a few moments.
Linking the Showcase CSS file
Now we'll link the p7showcase01.css file to the page. Open your CSS Styles Panel. If it's not already open, press Shift + F11 on your keyboard.
At the bottom of your panel you will see 5 icons. Click the first icon on the left:
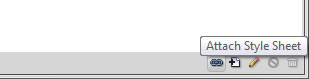
The Attach External Style Sheet dialog will open
Enter p7showcase01.css inside the File/URL box
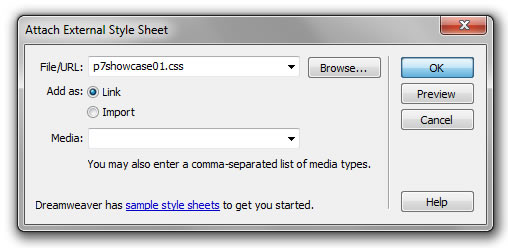
Click the OK button
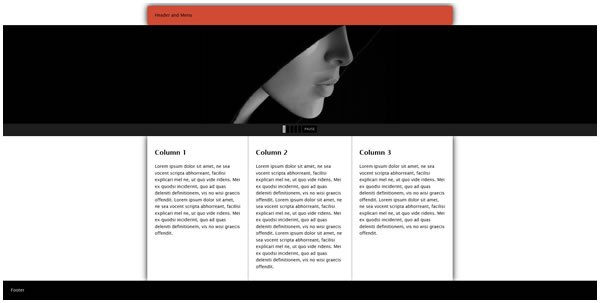
Preview in a browser:
That's a wrap!