Buy Now ($95) | Upgrade From IRM1 ($65) | IRM2 Home | Documentation
Image Rotator Magic 2The Ultimate Responsive and Adaptive Widgets for Dreamweaver
A Responsive and Adaptive Image Rotator from PVII
Image Rotator Magic 2 (IRM2) is an automated Dreamweaver widget that makes it easy to create engaging Image Rotators with engaging animations, usable and powerful features, and efficient image caching.
Install the extension
Extension installer files come in 2 formats: MXP and ZXP. MXPs are supported by Extension Manager versions MX, MX2004, 8, CS3, CS4, CS5, CS5.5 and CS6. ZXP is supported by versions CS5.5 and higher. Version CC and higher have dropped support for the MXP format. To continue to support all Adobe customers, regardless of version, we include both the classic MXP and the new ZXP versions.
For version CS6 and older:
Look for the extension installer file p7_IRM2_215.mxp in the root of the zip archive you downloaded. Double-click the files to install the extensions. Dreamweaver's Extension Manager will open and you will be prompted to complete the installation.
Dreamweaver Creative Cloud
As of CC 2015, Adobe has ceased to support its own Extension Manager. Use the PVII Extension Manager for Adobe Creative Cloud.
PVII Extension Manager for Adobe CC
( Windows and Mac)
Download and Install Instructions
Work in a defined Dreamweaver site
Before you begin, make sure you are working inside a defined Dreamweaver web site. This is necessary so that Dreamweaver knows how to link required assets. If you are new to Dreamweaver or need to learn how to define a web site, follow these simple steps:
Choose Site > New Site
Specify local site location
The Site category of the Site Setup dialog box is the only one you need to fill out to begin working on your Dreamweaver site. This category lets you specify the local folder where you’ll store all of your site files. When you’re ready, you can fill out the other categories in the Site Setup dialog box, including the Servers category, where you can specify a remote folder on your remote server.
Site Name
The name that appears in the Files panel and in the Manage Sites dialog box; it does not appear in the browser.
Local Site Folder
The name of the folder on your local disk where you store site files, templates, and library items. Create a folder on your hard disk or click the folder icon to browse to the folder. When Dreamweaver resolves site root-relative links, it does so relative to this folder.
Assets Folder
When you create a Rotator, the IRM2 system creates an asset folder in your defined site called p7ir2. When you publish your page, make sure you upload that folder to your server.
Using PVII IRM2
Establish an Insertion Point
Click on your page where you want the rotator to appear.
Open the IRM2 UI
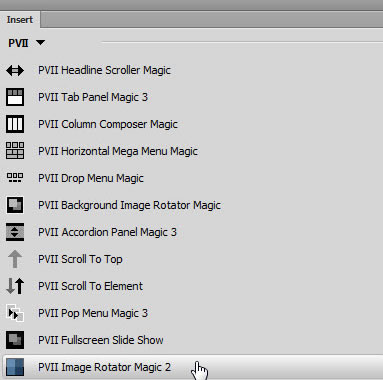
After establishing your insertion point, click the IRM2 icon in the PVII section of your Dreamweaver Insert Bar:

Or Insert Panel:
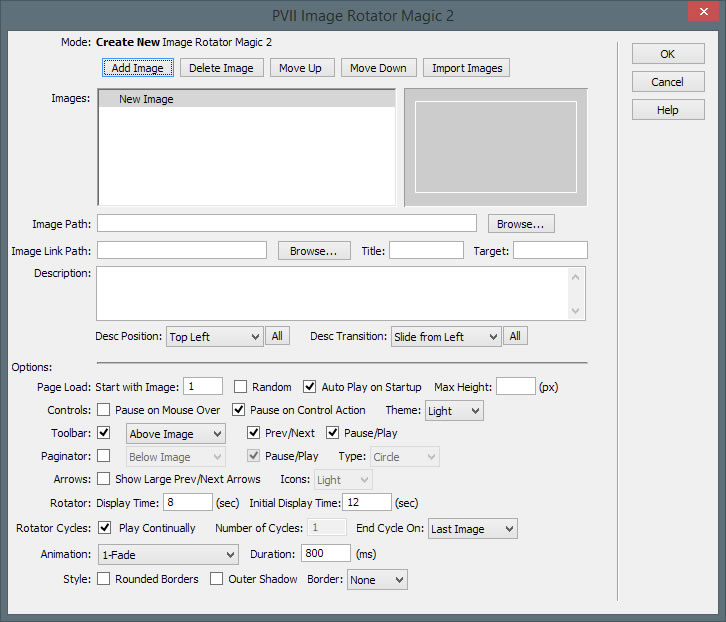
The interface will open..
You can create more than one rotator on your page. Add as many as you like.
Image Handling Buttons
There are five image handling buttons:
1. Add Image
Use this button to add one image, at a time, to your Rotator. Clicking this button add a new image element to the Images List. To choose the image to use, select the image element in the Images list and then click the Browse... button at the end of the Image Path box.
2. Delete Image
This button will delete the selected image element in the Images list
3. Move Up
This button will move the selected image element in the Images list up.
4. Move Down
This button will move the selected image element in the Images list up.
5. Import Images
The Import Images button allows you to add multiple images to your Rotator. When you click the button, the IRM2 Image Import screen will open:
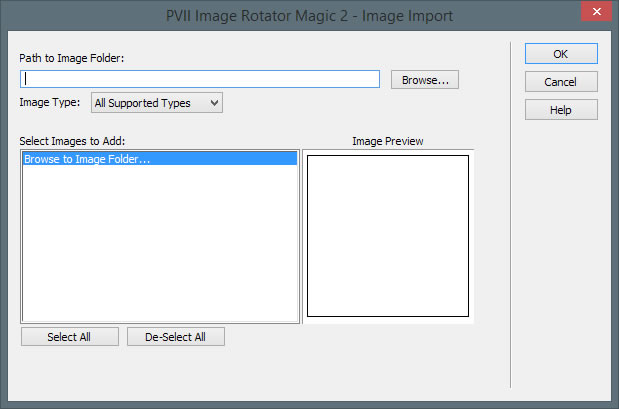
Tip: Before browsing to your image folder, you can opt to set a filter for specific Image Type.
Click the Browse... button to browse to your image folder and select any image inside the folder:
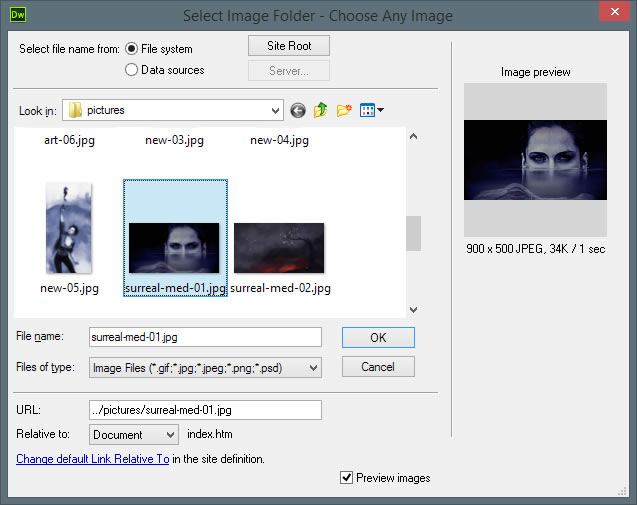
Then click OK.
All the images in that folder will appear in the Select Images to Add box:
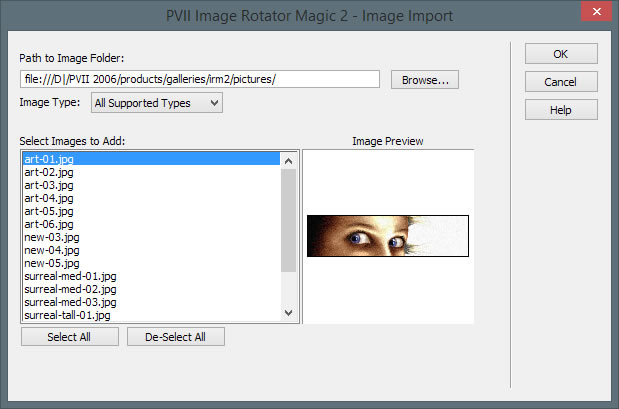
Use shift-select, CTRL-select, or the Select All button to choose which images to import.
Click OK to complete the import.
Image Path
Enter the path to your image
Browse...
Use the Browse button to open the Select the Image Rotator Image dialog box. You can change the image at any time by selecting the image in the Images list and clicking the "Browse..." button. Valid image types are: .gif, .jpg, and .png.
Image Link Path
The Image Link Path box allows you to set a hyperlink on the image. When the image is clicked the system will launch the linked page.
Browse Button:
Click the Browse button to open the Select the File to Link dialog box and choose the html page that you wish to link to.
Note: The Image Link functionality is optional and is blank by default. Supplying a link in this box enables the image link for the currently selected image. No other images are affected.
Link Title
This box allows you to add a title attribute to the Image Link, which will display as a small pop up near the cursor when the user mouses over the image. Enter a short description in plain text.
Target
You can enter a target attribute for the image link if you want to open the linked page in a new tab or browser window, or you would like to target a specific <iframe> or frames-based page.
Description
Enter an optional description for the currently selected image. This box supports plain text, as well as HTML markup, making it easy to add a mix of text and links. If you are not proficient at writing simple code, we suggest that you create a temporary page in Dreamweaver, enter your content, copy the markup in Code View, and then paste it into the IRM2 Description box.
Leave this box blank if you do not want a description box to display.
Desc Position
Position the optional Description on your screen, in one of five locations:
1. Top Left
2. Top Right
3. Bottom Left
4. Bottom Right
5. Below Image
All Button
In the event you want to have a single setting apply to all image descriptions, click the All button next to the Description drop-down list.
Desc Transition
Choose from four options to set an animation mode for your image Description:
1. None
2. Slide from Left
3. Slide from Right
4. Pivot
All Button
In the event you want to have a single setting apply to all description transitions, click the All button next to the Transition drop-down list.
Page Load
Start with Image...
Choose which image to begin with. The images will sequence from there in subsequent order. In most cases, the default value of 1 is appropriate.
Random
Select this option if you wish to have the system select your images in random order. Each time the page loads into the browser a random image order will be used.
Auto Play on Startup
Check this box if you want to have the Rotator automatically start playing when the Image Rotator first opens.
Max-Height
As of version 2.1.5, we've included a special Max-Height option in the IRM2 interface. This options allows you to display mixed-orientation images, or small images that would not look good scaled up to container width.
Controls
There are various control and toolbar permutations that you can opt to show.
Pause on Mouse Over
Select the Pause on Mouse Over option if you want the Rotator to pause when the user's mouse is over the image. The Rotator will automatically resume once the mouse is moved away from the image.
Pause on Control Action
With this box checked (the default) any click on the controls buttons will shift the Rotator into Pause mode. The Rotator will not resume until the Play button is clicked.
Theme
Choose the appropriate control color theme: Light or Dark.
Toolbar
Display a toolbar, which can display one or more icons, which you can select from the Toolbar options section, below.
Toolbar Position
Choose how you would like the Toolbar displayed:
- Above Image
- Below Image
Prev/Next
Display previous and next icons on the toolbar.
Pause/Play
Display pause and play icons on the toolbar.
Paginator
The Paginator will create a series of icons, one for each image, in a horizontally oriented list. These will act as trigger links to display the associated image. Choose the display option from the drop down list.
Paginator Position
Choose how you would like the Paginator displayed:
- Above Image
- Below Image
Pause/Play
Display a Pause/Play icon in the Paginator bar.
Type:
Select the Paginator icon type: Circle or Square
Arrows
Show Large Prev/Next Arrows
Enable this option to display large arrows that appear to the left and right of your image.
Icons
Choose the appropriate color theme for your Previous/Next arrows: Light or Dark.
Rotator
Display Time
This controls the amount of time each image is displayed during the rotation, in seconds. The default is 8 seconds.
Initial Display Time
This controls the amount of time the first image is displayed. During page load it is often desirable to allow the first image to be displayed slightly longer than the other images to give the rest of the page assets a chance to load. The default is 12 seconds.
Rotator Cycles
Play Continually
This option allows the Rotator to play through the images indefinitely. It will not stop unless the user clicks the pause button.
Number of Cycles
Enter the number of times you wish Rotator to play through all of the images.
End Cycle On
This allows you to choose the ending image for the Rotator cycle. When the Rotator has completed the assigned number of rotations it will stop on:
- Last Image -The Rotator will stop at the last image in the Image list.
- First Image - When the Rotator reaches the last image it will loop back and stop at the first image in the Image list.
Animation
Set the animation for your image slides. Choose from:
- None
- Fade
- Slide Horizontal
- Slide Vertical
- Soft Slide with Fade
- Fold
- Zoom
Duration
Set the animation duration for your image animation. The default 800ms (8/10ths of a second) works well across a wide range of devices. To speed up the animation, enter a lower number. To slow down the animation, enter a higher number.
Style
Rounded Corners
This option allows you to add rounded corners to the outer rotator structure.
Outer Shadow
This option allows you to add shadows to the the outer rotator structure.
Border
This option allows you to add a border to the the outer rotator structure.
Editing/Modifying a Rotator
You can edit the settings and options for any Rotator on your page by opening the IRM2 interface for that Rotator.
Removing a Rotator
To delete an existing Rotator on the page, open the IRM2 UI, as if you were going to edit the Rotator. The UI will open in Modify mode and a Remove button will be available in the column of command buttons along the right edge of the UI.
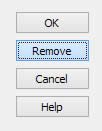
Click the Remove button to remove the show.
What will be Removed
The system will completely remove the html markup for the selected Rotator from your page. The system will also remove the link to the relevant CSS file and the JavaScript file, but only if there are no other Rotators remaining on your page.
What will Not be Removed
The system will not remove the p7ir2 folder.
CSS
There is one style sheet that comes with IRM2 and it is automatically linked to your page when you create a Rotator. There should not be a need to edit CSS. If you are an advanced user, or have a special need, please contact customer support and we'll be happy to assist.
External Linking and Bookmark Support
An opener detection system is included that allows you to set up links with special parameters that will load a page and also trigger a specific image in a IRM2 widget on that page. The opener will look for the IRM2 widget number, an underscore, and the IRM2 image number.
There are 2 methods available:
- Anchor Method: The system will look for "#ir2" plus a slide reference after the anchor. The anchor index.htm#ir21_4 will trigger slide 4 in the first IRM2 Widget on the page.
- URL Parameter Method: The system will look for "ir2=" in the URL parameter. The URL parameter index.htm?ir2=2_4 will trigger slide 4 in the second IRM2 Widget on the page. You can then give out the link so people can go directly to your specific content slide.
Note: This feature is meant to be used on links to your page from external locations ONLY —not on links that are in your page. To control the Image Rotator from links on the SAME page use the included IRM2 Control Actions, described below.
IRM2 Control Actions
The system also includes control actions that can be used to create Image Rotator Magic 2 actions on links located anywhere on your page, or that can be used in by other scripts to control IRM2 actions.
Available Control Behavior Actions:
- Open First Image
- Open Previous Image
- Play (Resume) Rotator
- Pause Rotator
- Open Next Image
- Open Last Image
- Open Image Number ...
Manually Assigning IRM2 Control Actions
There are times when you may want to manually assigning a control action, either for use in external scripts or when building pages dynamically. The control action function call will look like this:
P7_IR2ctrl('p7IR2_1','play')
- The first argument is the ID of the IRM2 root div.
- The second argument is the control action you wish to apply.
The HTML markup for a typical text link with a control action applied would look like this:
<a href="#" onclick="P7_IR2ctrl('p7IR2_1','play')">Play</a>
The available Control Actions are:
- P7_IR2ctrl('p7IR2_1','first') - Open First Slide
- P7_IR2ctrl('p7IR2_1','prev') - Open Previous Slide
- P7_IR2ctrl('p7IR2_1','play') - Start or Resume Auto Play
- P7_IR2ctrl('p7IR2_1','pause') - Pause the Auto Play
- P7_IR2ctrl('p7IR2_1','next') - Open Next Slide
- P7_IR2ctrl('p7IR2_1','last') - Open Last Slide
- P7_IR2ctrl('p7IR2_1',x) - Open the specified slide number, where x is the number of the slide
Using the Behavior to create Control Actions
Creating a new Control Actions behavior
- Select (click) a text link or image to act as the behavior Control.
- Open your Dreamweaver Behaviors Panel (Shift + F4)
- Click the plus sign (+) on the Behavior Panel.
- Choose Studio VII > Image Rotator Magic 2 > Control Actions to open the interface.
- Select the widget you wish to act on.
- Select the action.
- Click OK to apply the behavior.
Modifying an existing Control Actions behavior
- Select the element that contains an existing Image Rotator Control behavior.
- Double-click the Image Rotator Magic- Control Actions behavior in the Behaviors Panel to open the interface.
- Select the widget you wish to act on.
- Select the action.
- Click OK to apply the revised behavior.
The Interface
The Image Rotator Magic 2 -Control Actions interface allows you to select an action to apply.
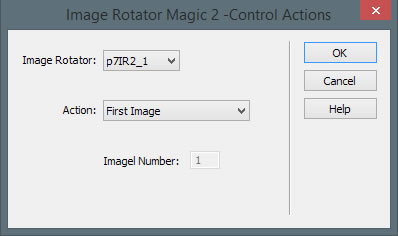
The Interface Items
Image Rotator
The interface contains a listing of all of the Image Rotator widgets on your page. The list will display the ID of each widget. Select the Image Rotator you want to control.
Tip: If you are unsure about which widget relates to which ID, click the Cancel button and switch to Code View. In Code View, locate all IDs that begin with p7IR2. The opening DIV tag looks like this:
<div id="p7IR2_1" class="p7IR2-01 p7IR2 rounded shadow border-dark">
Action
Select the action you want to apply.
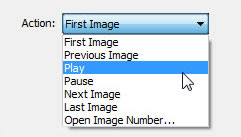
First Image: This will display the First image.
Previous Image: This will display the image that comes before the currently displayed image.
Play: This will Start or (resume) the Auto Play Mode.
Pause: This will Stop (or pause) the running Auto Play mode.
Next Image: This will display the image that comes after the currently displayed image.
Last Image: This will display the last image.
Open Image Number: This allows you to select the exact image to be displayed by entering the Image Number.
Image Number: This box is active only when the Open Image Number action is selected. Enter the number of the image you wish to display.
Convert an Existing First-Gen IRM Rotator to IRM2
The Image Rotator Magic 2 system is designed to automatically convert (Upgrade) an existing Image Rotator Magic 1 widget to the Image Rotator Magic 2 widget. Converting is as easy as clicking inside the existing Image Rotator Magic 1 widget and clicking the Image Rotator Magic 2 icon.
The Image Rotator Magic 2 user interface is designed to open to the correct mode based on your current insertion point in the document:
- If your insertion point is not within an existing Image Rotator Magic 1 widget the user interface will open in the normal Image Rotator Magic 2 Create mode.
- If your insertion point is inside an existing Image Rotator Magic 1 widget the Convert from Image Rotator Magic 1 dialog box will open allowing you to choose whether to Convert (Upgrade) the existing widget.
Whenever your current insertion point is inside of an existing Image Rotator Magic 1, the Convert from Image Rotator Magic 1 interface will open.
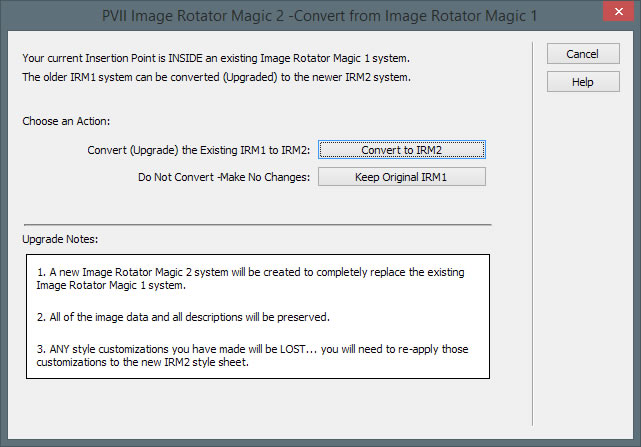
Choose an Action
Convert to IRM2
Click this button to launch the Convert (Upgrade) process. The system will open the Image Rotator Magic 2 Modify interface populated with the existing IRM1 image, description and image link data form the Image Rotator Magic 1 system. The options will also be reflected in the interface.
When the Image Rotator Magic 2 interface opens make any additional changes and and set any new options as desired, then Click OK to finish the Convert process.
The Conversion Process:
- The entire html markup of the original Image Rotator Magic 1 widget will be replaced by the new Image Rotator Magic 2 html markup.
- The Image Rotator Magic 1 style sheet link will be removed, and a new, default, Image Rotator Magic 2 style sheet be be linked in its place.
- The Image Rotator Magic 1 script link will be replaced by the Image Rotator Magic 2 script link.
Keep Original IRM1
Click this button abort the conversion process. The existing Image Rotator Magic 1 widget will not be altered.
Support
See our main support page for contact information. PVII support never ends.