SELECTIONS: Polygon Marquee selections
Aside from Scaling, I’d be willing to bet that the bitmap editing operation Web designers use the most is selecting, cutting out, or changing specific areas of an image. Fireworks Marquee, Lasso, and Pen tools enable you to select specific pixel areas of a bitmap.This tutorial focuses on the Polygon Marquee tool.
- Choose File > Open.
- Browse to the PVII_PhotoMagic directory on your hard drive.
- Locate the blue_jay.jpg file and click on it to select it.
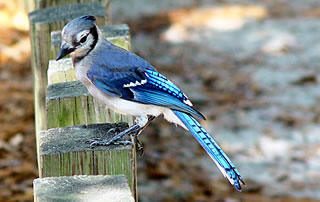
Figure1: Bluejay photo by Ken Kiser
- Click on Open
- Click on the Zoom tool (the magnifying glass) at the bottom of the Tools panel, and then click twice on the bird’s eye.
- Select the Polygon lasso tool.
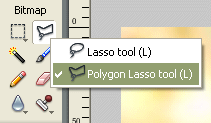
Figure2: Polygon Lasso tool
The Polygon Lasso tool looks like an upside-down wire coat hanger with a broken hook. The tip of the broken hook is where the Lasso spins from, like silk from a spider.
- Set the Edge type for the tool to Anti-Alias in the Property inspector.
- Beginning with the tip of the bird’s beak, start “stitching” the marquee around its entire head, clicking every few pixels to place the polygon points.
Marquee marking can be tiresome, but care is rewarded by not having to correct the marquee boundary later.
- Continue marquee marking around the bird’s head until you return to your starting point. When you reach the starting point, a tiny cursor cue in the form of a square shows up next to the Lasso hook.
- Click on the image to close the path.
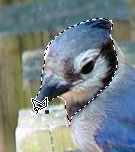
Figure3: Polygon marquee marking
Because the color of the bird’s wing and tail feathers are so much brighter, they draw the focus away from his head. With the head isolated by the marquee, you can increase its tonal range by increasing the contrast, and then using the Fireworks Levels feature.
- Choose Filters > Adjust Color > Brightness/Contrast.
- Move the brightness and contrast sliders to 3.
- Click on OK to close the Brightness/Contrast dialog box.
- Choose Filters > Adjust Color > Levels. The Levels dialog box opens
There is a flat section at the left end of the histogram. The left end represents the image shadows. By dragging the left slider toward the center of the histogram you “push” the color range of the shadows toward the mid tone range in the image, therefore brightening it.
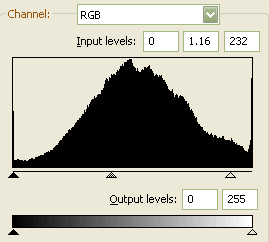
Figure4: Corrected histogram
- Set the Channel selector to Blue.
- Drag the left slider to the right until the third number in the Input levels changes from 255 to be between 232 and 235
- Drag the middle selector toward the right until the midtone level is around 1.16.
- Click OK to accept the changes and close the dialog box.
- Choose Select > Deselect to remove the marquee.
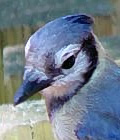
Figure5: That's better!
Great job! Now that you have adjusted the color, you’ll practice using the Polygon lasso tool a bit more, plus learn a popular photo effect. Your document window should still be zoomed to 200%. If it is not, choose the 200% setting from the Set Magnification pop-up menu at the bottom of the document window.
- Click on the Polygon lasso tool to select it.
- Start stitching the marquee around the entire bird, clicking every few pixels to place the polygon points. You’ll need to be especially careful around the bird’s feet.
- Continue marquee marking around the bird head until you return to your starting point. When you reach the starting point, a tiny cursor cue in the form of a square displays next to the Lasso hook.
- Click to close the path.
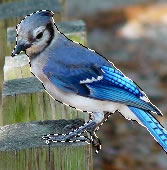
Figure6: Marching ants
Now that the path is closed, and the “marching ants” of the marquee have surrounded the bird, you can have some fun with the image.
- Choose Select > Select inverse to select the background of the image.
- Choose Filters > Other > Convert to Alpha.
The colors are removed from the pixels of the background, leaving only the Alpha information. To add white to the image and change its display to full gray scale, change the canvas color from transparent to white.
- Modify > Canvas > Canvas color.
- Click in the White radio button.
- Choose Select > Deselect to turn off the marquee.
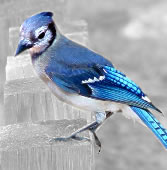
Figure7: The bright blue bird pops out of the grayscale background
Things to try: Before turning off the marquee, lighten the black and white background with the Hue/Saturation feature. Colorize the background with the Hue/ Saturation feature. Click on the paint bucket tool, pick a color, gradient, pattern, texture, or combination of the above, and click on the background to fill it.