PVII Image FX User Guide
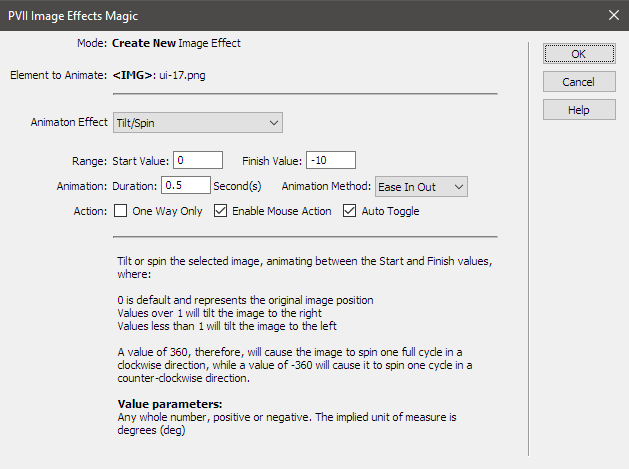
Image FX gives you the ability to animate any image on your page. Of course, since this is a PVII extension, you can orchestrate your animations from within a graphical user interface that installs and runs inside Dreamweaver.
Installing Image FX
Extension installer files come in 2 formats: MXP and ZXP.
MXPs are supported by Extension Manager versions MX, MX2004, 8, CS3, CS4, CS5, CS5.5 and CS6.
ZXP is supported by versions CS5.5 and higher.
To install this product,
- Open your Extension Manager
- Click the Install icon or link
- Browse to where you unzipped the installer file
Dreamweaver CC 2015 (and higher) Extension Installation Information
As of CC 2015, Adobe has ceased to support its own Extension Manager. Use the PVII Extension Manager for Adobe Creative Cloud:
PVII Extension Manager for Adobe CC
( Windows and Mac)
Accessing Image FX
Before attempting to open the IFX UI, make sure you have an image selected. IFX can only be assigned to images.
Opening the UI
Select an image on your page and choose one of the 4 methods listed below to open the IFX interface:
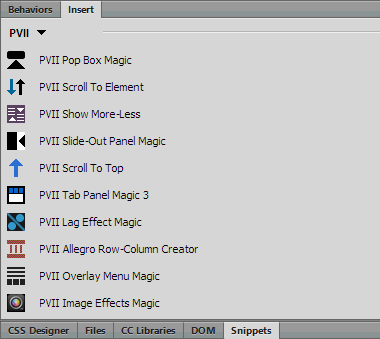
1. Insert Bar
Switch to the PVII category. Image FX is the last one in the screen capture below
![]()
2. Insert Panel
Switch to the PVII category. Image FX is the last one in the screen capture below
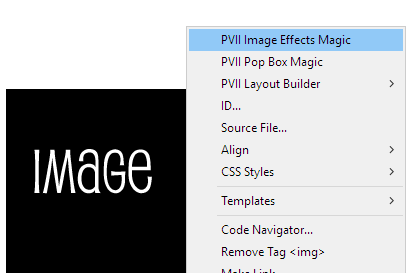
3. Right Click
Right click on your image and choose Image FX by PVII
4. Insert Menu
Choose Insert > Studio VII > Image FX by PVII
The main IFX UI will open.
Image FX Interface: Options & Settings
The Image FX interface makes customizing your widget easy!
The IFX Interface
The IFX UI allows you to easily define and configure IFX instances, one at a time, and once configured, the UI can be used to modify (edit) each instance as often as you like. .
Mode
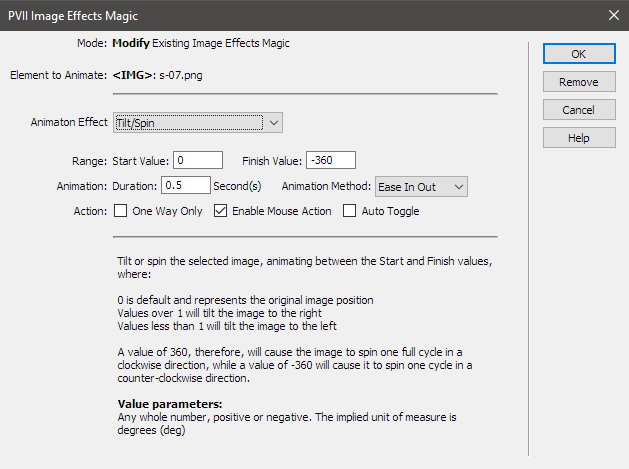
If you are creating a new IFX effect, the mode will be Create. If editing an existing effect, the mode will be Modify.
Element (Tag) to Animate
Since IFX is assigned to images, the element to animate will always be an <IMG> tag.
Animation Effect
Choose from 15 animation effects. When you select an effect, the bottom half of the UI screen will change to describe the selected animation, how it works, and what options are available. The first 10 animation allow you to set Range, Animation, and Action options. The last 5 animation effects are custom and not all options are available. The ones not available will be grayed out and uneditable.
Range
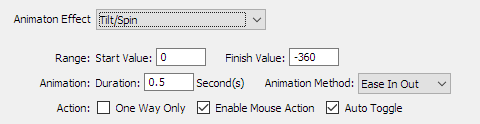
Set a starting and ending value for your animation. In the above screen capture, the Tilt/Spin animation is used. By setting the Finish Value to -360 we are setting the image to spin counterclockwise in a full circle.
Animation
The following animation options are available:
Animation Duration
This option allows you to set, in seconds, the length of the animation. Increase the number to slow the effect down. Decrease the number to make the effect go faster.
Animation Method
Choose the method your animation will use. In CSS-speak, this property is referred to as transition-timing-function:
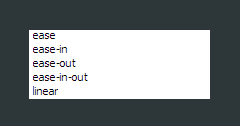
See complete reference at Mozilla.org
Actions
The following action options are available:
One Way Only
The animation effect will run until it reaches its Finish Value. It will not reverse to its Start Value when you mouse out or tap/click the image a second time.
Enable Mouse Action
This option, which is enabled by default, allows the animation, when run on a mouse-enabled device, to be triggered on mouse-over (hover). Moving your mouse out of the image will cause the animation to run in reverse back to its start value (unless the One Way Only option has been set).
Auto Toggle
Selecting this option, which is enabled by default, will cause hovering or tapping an image to make all other IFX images return to their start values (unless the One Way Only option has been set).
Effect Descriptions
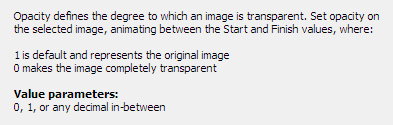
Reading the description for each animation will help you to understand how the animation works and how to set your options Here is the description for the Opacity effect.
Custom Effect Descriptions
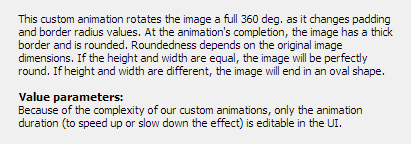
The 5 custom effects: Morph, Focus, Skew, Shake, and Pulse are special in that they use multiple transformations and/or CSS keyframes. Because of this, the options you can set in the interface are limited. The description sections will explain this in greater detail. Here is the description for the Morph effect:
Command Buttons
There are 3 buttons always present in the UI:
OK
Click OK to add your new IFX instance to your page, or to execute your edits when modifying an existing IFX instance.
Cancel
Click Cancel to terminate your UI session. Nothing will be created or modified.
Help
Click the Help button at any time to open this user guide.
If you are editing an existing IFX instance, a fourth button will appear:
Remove
Click the Remove button to remove the current IFX instance. If it is the only IFX instance on your page, the link to the IFX JavaScript and CSS files will also be removed.
CSS and Design Tips
The following tips will server to help you get the most out of PVII Image FX.
Image FX and other CSS Animations
CSS cascades and inherits. It's the nature of the specification. So, if you have an existing CSS animation assigned to an image, you should remove that animation before assigning an IFX effect, since the second animation will either override the original animation or, depending on the settings, cancel both. If you have used Lage Effect Magic to animate an image, you can switch the LEM effect to an element that contains your image, such as a paragraph or DIV that your image is inside of. Then you can assign an IFX effect to the image, and it will work perfectly.
Containing an animation effect
Some animation effects can be configured to in such a way that they will move or expand behind the boundaries of their containing element. For example, consider an image inside a narrow sidebar on the right side of your page. If that image is set to zoom, it can become wider than the sidebar, thereby expanding beyond the sidebar's boundaries. The zooming effect can also cause a horizontal scrollbar to appear while the animation is running. The first example below, shows an image inside a bordered box. The image is set to zoom. Watch how the image expands outside the box:

We have included a CSS rule in the IFX style sheet that you can use to assign overflow: hidden to a containing element that surrounds your image. In this case, the image is inside a paragraph:
<p><img src="../demo/thumbs/pic-07.jpg" alt="" width="187" height="200" class="p7IFX scalable-rounded" data-ifx="8,1,1.5,4,0.5,0,1,1"></p>
By assigning the ifx-overflow class to the paragraph, we can constrain the effect inside the paragraph boundaries:
<p class="ifx-overflow"><img src="../demo/thumbs/pic-07.jpg" alt="" width="187" height="200" class="p7IFX scalable-rounded" data-ifx="8,1,1.5,4,0.5,0,1,1"></p>
Now the image will never jump outside the box!
Transform Origin
Let's say you have an image on your page and you want it to start out smaller than normal. When the image is hovered over, or tapped, the image will then grow to full size. The problem is that the default (and usually best) position of a CSS transformed element is dead center, relative to its original dimensions. Consider this image, that is set to a zoom start value of .75:
The large amount of space above and below the image is due to the default transform-origin. Now consider the following image, which runs the same IFX effect. The difference is that we've assigned a custom class that rests transform-origin to zero:
.origin-zero {transform-origin: 0px 0px;}
<img src="../demo/pics-01/s-13.jpg" alt="" width="600" height="600" class="p7IFX scalable-rounded origin-zero" data-ifx="8,.5,1,4,0.75,0,1,1">
The space at the top is gone. Though there is nothing that can remove the space below, unless. we use a containing element. So let's do the same image, this time placing it inside a DIV that is assigned a background color.
We removed the transform-origin fix, making the image center in vertically and horizontally in its container. But because the container is defined by a background color, the space around it looks more like matting. Not bad at all.
Publishing
When publishing to your server, make sure to upload the p7lIFX folder. The folder is created in the same folder as the page you are working on, and contains the IFX JavaScript file.
Support Options
Before making a support inquiry, please be certain to have read the documentation that came with your product. Please include your Order Number, Dreamweaver version, as well as your computer operating system type in all support correspondence.
Support Forum
PVII maintains a Web Forum community. Go Direct to the Web Forum
E-Mail and Phone Support
E-Mail: support@projectseven.com
Phone: (336) 374-4611
Phone hours are 9:00am - 5:00pm Eastern Time U.S.