Gadzooks User Guide: A PVII Harmony Page Pack Collection
Gadzooks is a Page Pack Collection that installs inside Dreamweaver, allowing you to instantly create one of ten professionally designed, responsive web pages. Each page is complete and ready to go. Simply add your content and images and you are ready to publish.
About Gadzooks
Gadzooks pages are structured using our Harmony page layout tool and contain fully functional Adaptive Menu Magic menus. If you enjoy coding yourself, Gadzooks may be all you need. If, however, you would prefer to have the ability to edit and customize your page structure and your navigation menus, the following related products will make your Gadzooks pages fully editable from within a user interface:
Harmony
Harmony allows you to edit the column/row configuration of any Gadzooks page, at any time. Add, remove, or re-order columns; change widths; define colors; set border effects; define box styles.
Adaptive Menu Magic
Visually edit and manage the responsive navigation bar on every Gadzooks page. Adaptive Menu Magic is the most advanced menu system available for Dreamweaver. It is fully responsive, adaptive, and meets ADA accessibility standards.
Art Gallery Magic
Art Gallery Magic drives the animated banner gallery on Gadzooks layout-03. While proficient coders should have no problem adding their own images to the code, the Art Gallery Magic interface will automate the entire process!
CSS Style Switcher
This free extension will enable you to edit and manage the CSS effects assigned to the images on the portal page (layout-01) and the mini-grid page (layout-08) from a dedicated interface.
Note: Whether you own the related products or are considering purchasing one or more, remember that each of the products can be used on any page or project you need to complete. There are no limitations.
Installing Gadzooks
Extension installer files come in 2 formats: MXP and ZXP. MXPs are supported by Extension Manager versions MX, MX2004, 8, CS3, CS4, CS5, CS5.5 and CS6. ZXP is supported by versions CS5.5 and higher. Version CC and higher have dropped support for the MXP format. To continue to support all Adobe customers, regardless of version, we include both the classic MXP and the new ZXP versions.
Dreamweaver CC 2015 (and higher) Extension Installation Information
As of CC 2015, Adobe has ceased to support its own Extension Manager. Use the PVII Extension Manager for Adobe Creative Cloud...
PVII Extension Manager for Adobe CC
( Windows and Mac)
Accessing Gadzooks
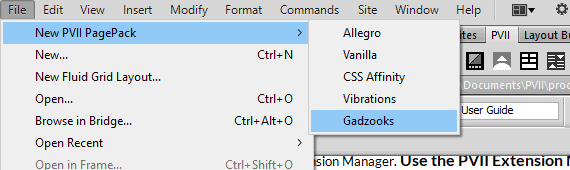
To open the interface, choose File > New PVII Page Pack
The Interface will open
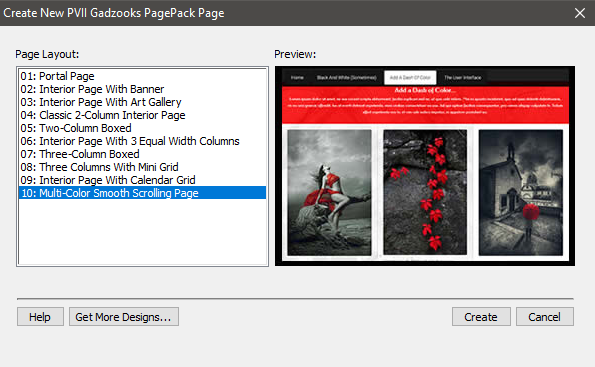
Simple choose a Page Layout and click the Create button. A Save dialog will open.
Give your page a name and save it within your defined Dreamweaver site.
Gadzooks is made for Dreamweaver Templates
After you create your Gadzooks page, there is an important decision you should make. If you wish to manage site-wide repeating content, such as mastheads, logos, navigation menus, and footers, you need to use some type of site-wide management technique. The most popular method for Dreamweaver users is DWT (Dreamweaver Template).
To convert your Gadzooks page to a Dreamweaver template:
After creating your Gadzooks page, edit the content that will be common to all the pages in your site. Finalize your logo and masthead, your menu, and your footer. Now you're ready to make a Template.
Choose File > Save As Template
Follow the onscreen prompts to save your new template.

Leave the DWT file open, as you'll be doing some work in it.
Create an Editable Region for page content
Switch to Code View in your DWT file.
Until you create an editable content region, all content on your page will be locked. You want your logo to be locked, and your menu, and your footer. But you will certainly need to have your page's main content areas be editable so that you can add relevant content to each of the pages in your site.
Here is the head code for Gadzooks Layout-04 (Classic 2-Column Interior Page) after being converted to a Template:
        <!doctype html>

          <html>

          <head>

          <meta id="p7AMM" name="viewport" content="width=device-width">

          <meta charset="utf-8">

          <!-- TemplateBeginEditable name="doctitle" -->

          <title>Gadzooks 04</title>

          <!-- TemplateEndEditable -->

          <link href="https://fonts.googleapis.com/css?family=Roboto:300" rel="stylesheet">

          <link href="https://fonts.googleapis.com/css?family=Fascinate" rel="stylesheet">

          <link href="../products/staging/gadzooks/testing/dwt/p7hmy/p7HMY-01.css" rel="stylesheet" type="text/css" media="all">

          <link href="../products/staging/gadzooks/testing/dwt/p7amm/p7AMM-01.css" rel="stylesheet" type="text/css" media="all">

          <link href="../products/staging/gadzooks/testing/dwt/p7gadzooks/p7GADZ-01.css" rel="stylesheet" type="text/css" media="all">

          <script type="text/javascript" src="../products/staging/gadzooks/testing/dwt/p7hmy/p7HMYscripts.js"></script>

          <script type="text/javascript" src="../products/staging/gadzooks/testing/dwt/p7amm/p7AMMscripts.js"></script>

          <style type="text/css">

          </style>

          <!-- TemplateBeginEditable name="head" -->

          <!-- TemplateEndEditable -->

          </head>
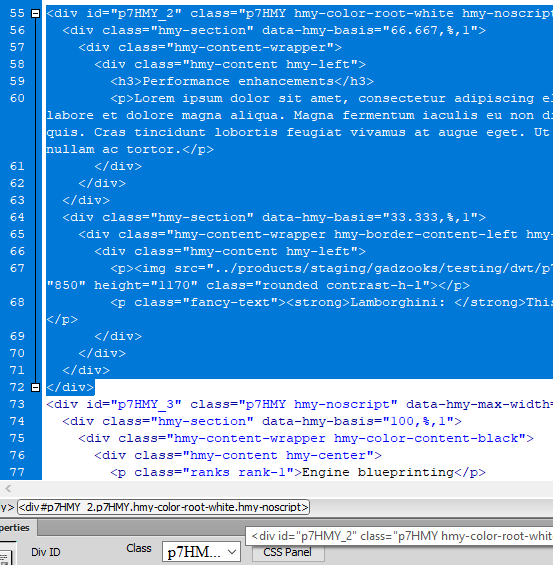
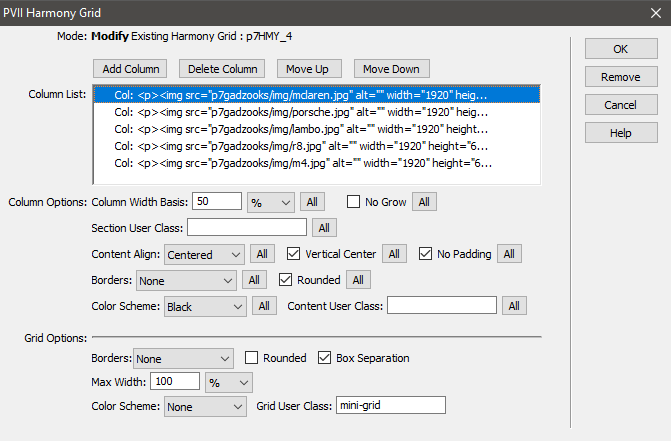
In each Gadzooks layout, there are 3 separate Harmony instances. Each instance's root DIV is assigned an ID: p7HMY_1 (Navigation), p7HMY_2 (content), and p7HMY_3 (bottom content, including footer social icons, and ranked mission points).
The content area is always going to be p7HMY_2, and that's the DIV we want to wrap inside of an editable region.
Place your cursor inside the p7HMY_2 DIV and click the associated tag on the Tag Selector bar that runs along the bottom of your Code window (just above the property inspector). The entire code for p7HMY_2 will highlight.
With the p7HMY_2 code still highlighted, choose Insert > Template Objects > Editable Region
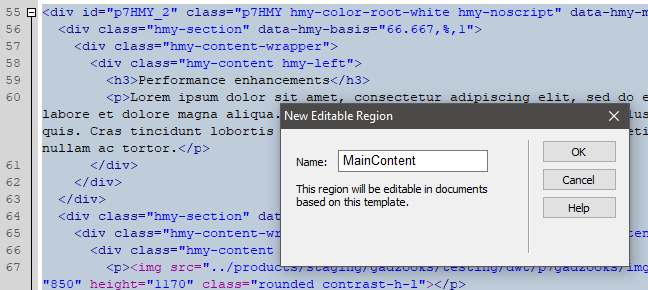
Enter a name (MainContent is pretty appropriate) and click OK. Your Template is now ready for saving.
Save your DWT file and close it.
Creating a child page based on your new template
Now that your template is saved, you can easily create one or more child pages. To do so...
Choose File > New
The New Document Window will open.
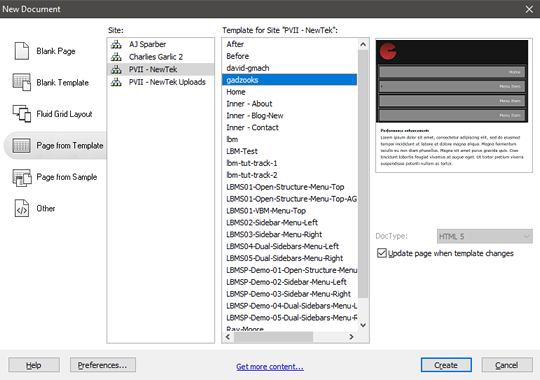
Click Create.
The generated page will open. You should save it in your defined site before proceeding.
Note: Make sure you save the page within your defined Dreamweaver site, before beginning to edit it.
As you move your cursor around the page, you'll notice that only the content inside the second Harmony instance is editable.
Powered by Harmony
Use the methods described above and a single Dreamweaver template can drive your entire site—a site where each and every child page can have a completely different structure and look. All you need to do is place your cursor anywhere inside the editable region and open the Harmony interface, where you can then delete columns, add columns, change their width, and so very much more.
Editing locked areas inside your DWT file
You will not be able to edit or delete any content inside the masthead, footer, or menu. Those areas can only be edited inside your DWT file. Simply open your DWT file, make your changes (a revised logo, a new menu item to access a new page, a new year for your footer's copyright notice). When you save the DWT file, Dreamweaver will ask if you want to update pages based on the template.

Gadzooks Asset Folders
Make sure to upload each of the Gadzooks asset folders—p7gadzooks, p7hmy, p7amm, and (if layout-03 is used) p7agm—when publishing to your web server.
Editing Tips
If you are adept at coding HTML and CSS, you will find it quite easy to customize your Gadzooks page. if you own Harmony, of course, the process will be significantly easier, and fully automated. For the details on how to work with Harmony pages, please refer to:
We make liberal use of one of Harmony's most powerful features: User Classes. If you own Harmony, you will be able to see the user classes assigned to various items in the UI...
Tip: To assign multiple class names, simple separate each one with a single space. See also:
Once you've ascertained the class names from the Harmony UI (or from the page markup) you can then open the Gadzooks CSS file and use the Find feature to locate them. The Gadzooks CSS file is located at this path:
p7gadzooks/p7GADZ-01.css
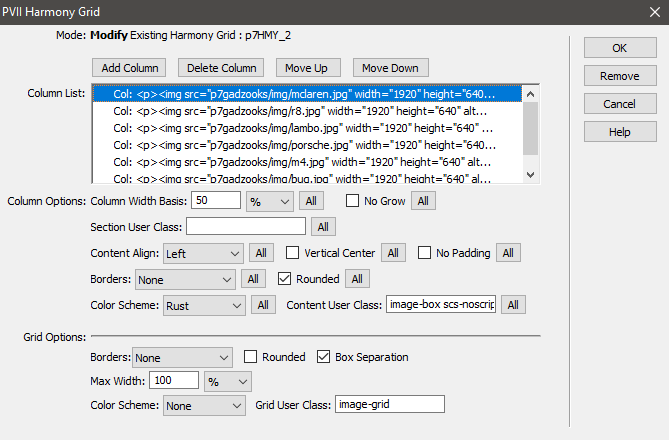
The Mini Grid: Layout-08
The mini grid showcases a nested Harmony instance inside the page's right column. Here is the Harmony UI for the parent Harmony instance (p7HMY_2):
The mini-grid is nested inside the third content column, which is assigned the Content User Class grid-container.
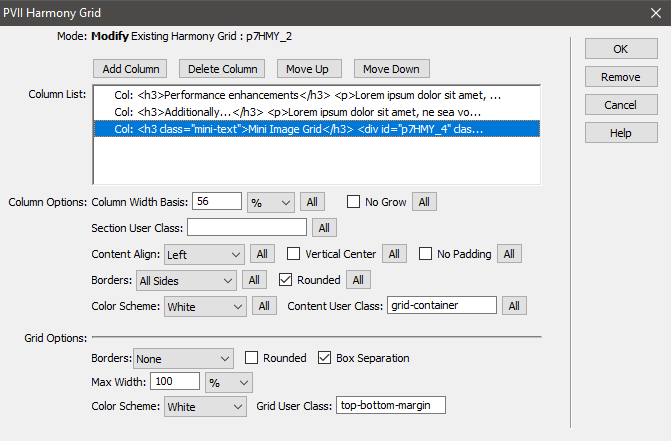
If you place your cursor inside the mini-grid and open the Harmony UI, you can see the settings:
This nested Harmony instance is assigned a Grid User Class of mini-grid.
The Ranked Missions Listing
At the top of the Harmony instance that houses the footer and social media icons, is a dark bar containing mission points that are ranked using different font sizes.

The structure and ease of maintaining this bar (if you want to) is really easy. Here's the markup:
<p class="ranks rank-1">Engine blueprinting</p>

<p class="ranks rank-2">Chassis modifications</p>

<p class="ranks rank-3">Performance exhausts</p>

<p class="ranks rank-4">Gauge package</p>

<p class="ranks rank-5">Performance Chips</p>

<p class="ranks rank-1">...and much more</p>
Each point or mission is a paragraph. Each paragraph is assigned 2 classes. The first class ranks is assigned to all paragraphs. The second class defines the font size. There are 5 ranks: rank-1 to rank-5.
Support Options
Before making a support inquiry, please be certain to have read the documentation that came with your product. Please include your Order Number, Dreamweaver version, as well as your computer operating system type in all support correspondence.
Support Forum
PVII maintains a Web Forum community. Go Direct to the Web Forum
E-Mail and Phone Support
E-Mail: support@projectseven.com
Phone: (336) 374-4611
Phone hours are 9:00am - 5:00pm Eastern Time U.S.