megavator Mega menu Instruction
Customize your Megavator Menus step-by-step
Lesson 4: Making a Vertical Megavator
There may be times when a project calls a Megavator menu with vertically stacked panel headings and sub-menu panels that align to the right. We've made Megavator flexible enough to allow this type of modification. Let's go through the steps.
Open work02.htm
Here is the page Markup (with text content truncated):
<div id="wrapper">
<div class="banner">Banner / Logo</div>
<div class="leftcolumn">
<div class="column-content">
<h1>Left Column</h1>
<p>Lorem ipsum dolor sit amet...</p>
</div>
</div>
<div class="rightcolumn">
<div class="column-content">
<h1>Right Column</h1>
<p>A re-engineering of your current...</p>
</div>
</div>
<div id="footer">Footer</div>
</div>
We'll establish an insertion point at the top of the rightcolumn DIV, but before the beginning of the column-content DIV.
Place your cursor inside the right column.
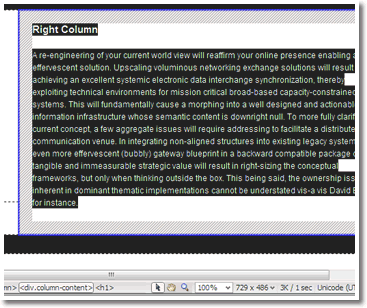
On your Tag Selector bar, which runs along the bottom of Dreamweaver's window, click <div.column-content>
The column-content DIV will highlight.
Press your keyboard's left arrow key once. This will position your cursor just above the column-content DIV.
Your insertion point is now established just above the column-content DIV, but still inside the rightcolumn DIV.
-Click the Elevator Panel Magic icon ![]() in the Common Section of Dreamweaver's Insert Bar (or CS4 Insert Panel).
in the Common Section of Dreamweaver's Insert Bar (or CS4 Insert Panel).

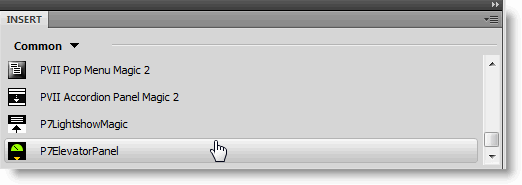
Dreamweaver CS4 Users: We highly recommend switching to Classic Workspace mode, which allows for a conventional Insert Bar across the top of your Design View window. If you use the new CS4 workspaces, the Insert Bar becomes a vertical panel that violates Windows and OS X interface conventions. In addition to being hard to use, the vertical Insert Bar has no support for mouse wheel scrolling, making it rather unusable. We are hoping Adobe will fix this (and other) UI issues in the next version of Dreamweaver.
Alternatively, you can choose Insert > Studio VII > Elevator Panel Magic by PVII.
The Elevator Panel Magic interface will open.
Create 3 Panel Headings as follows:
- Products
- Services
- Company Info
To add your Headings, click the Add button above the Panel Headings list
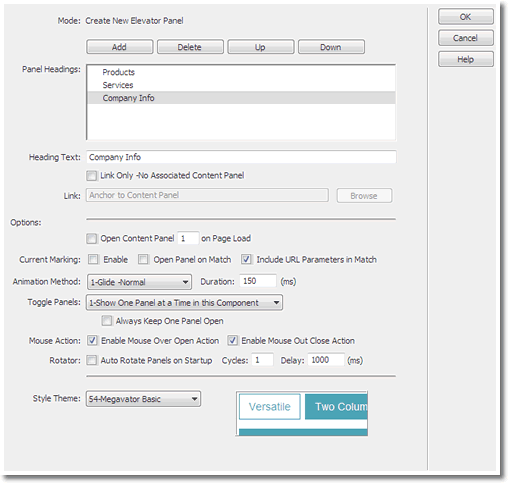
Uncheck the Open Content Panel 1 on Page Load box
Change the Animation Duration to 150
Check the Enable Mouse Over Open Action and the Enable Mouse Out Close Action boxes
Select Style Theme select 54-Megavator Basic
Tip: Clicking the Help button will launch a complete Help file in a browser window, covering all aspects of the interface and its options.
Click OK
Your Megavator is built and your page should look like this:
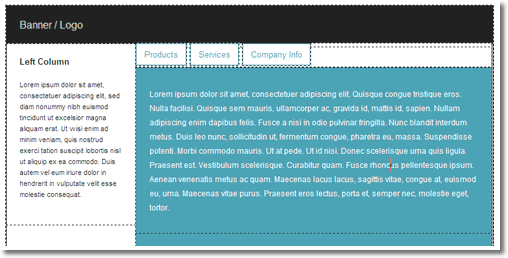
Now we'll move the panel headings into the left column.
Place your cursor inside the first panel heading text "Products".
On your Tag Selector bar click <div.p7epm_trigs#p7EPMt_1>
The panel heading DIV will highlight
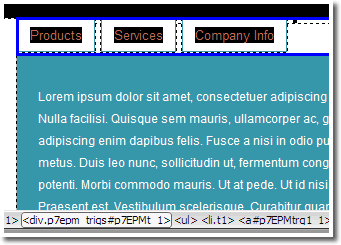
Choose Edit > Cut
Now place your cursor inside the left column text and click <div.column-content> on your Tag Selector bar
The left column content will highlight
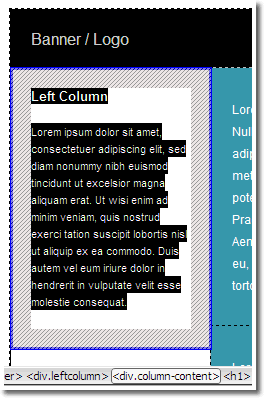
Press your keyboard's left arrow key once to position your cursor between the leftcolumn and the column-content DIVs
Choose Edit > Paste
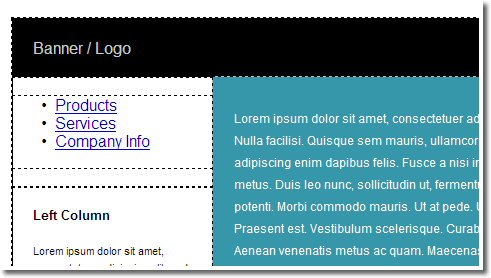
The panel headings are now in the left column. They are no longer styled (we'll take care of that in a moment), but if you preview your page you'll see that the Megavator is working just fine.
To get our headings styled we will simply wrap the panel heading DIV inside another DIV and assign it the Megavator basic style theme class.
Place your cursor inside the panel heading text (it doesn't matter where) and click <div.p7epm_trigs#p7EPMt_1> on your Tag Selector bar
Switch to Code View
Click the Wrap Tag icon (yellow pencil)
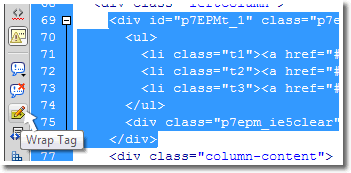
Type div inside the angle brackets and press Enter (Return) twice to create the new DIV
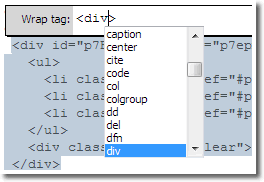
Your code will now look like this:
<div>
<div id="p7EPMt_1" class="p7epm_trigs">
<ul>
<li class="t1"><a href="#p7EPMc1_1" id="p7EPMtrg1_1">Products</a></li>
<li class="t2"><a href="#p7EPMc1_2" id="p7EPMtrg1_2">Services</a></li>
<li class="t3"><a href="#p7EPMc1_3" id="p7EPMtrg1_3">Company Info</a></li>
</ul>
<div class="p7epm_ie5clear"> </div>
</div>
</div>
Assign the p7EPM54 class to the new DIV so it looks like this:
<div class="p7EPM54">
<div id="p7EPMt_1" class="p7epm_trigs">
<ul>
<li class="t1"><a href="#p7EPMc1_1" id="p7EPMtrg1_1">Products</a></li>
<li class="t2"><a href="#p7EPMc1_2" id="p7EPMtrg1_2">Services</a></li>
<li class="t3"><a href="#p7EPMc1_3" id="p7EPMtrg1_3">Company Info</a></li>
</ul>
<div class="p7epm_ie5clear"> </div>
</div>
</div>
Switch to Design View
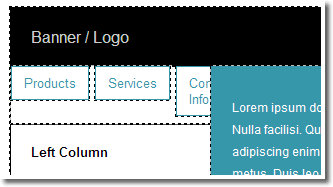
We have style, but our headings are displayed horizontally. Let's make a quick edit to the Megavator syle sheet to fix that.
Open your CSS Styles panel
Locate and select the .p7EPM54 .p7epm_trigs rule
Click the Add Property link and select padding from the list
Enter 3px for the padding value
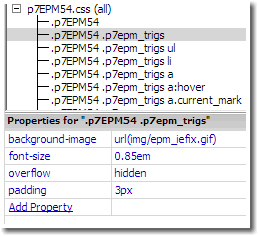
select the .p7EPM54 .p7epm_trigs li rule
Set the float value to none
Change the margin value to 0
Change the padding values to 0 0 3px 0
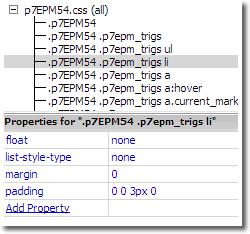
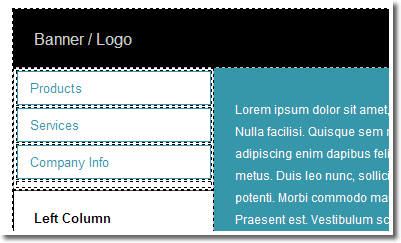
Your panel headings should now look like this
Preview the page in a browser
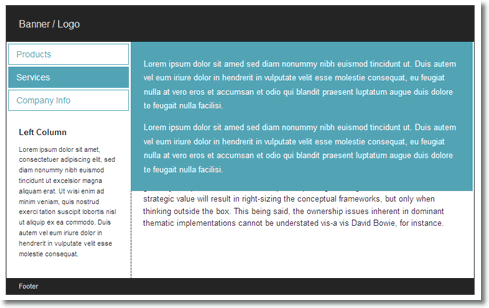
You have a working vertical Megavator.
Of course, depending on your sub-menu content you might want to position and size your panels. Let's tackle that task next.
Custom Positioning Sub-Menu Panels for a Vertical Megavator
To position and size the sub-menu panels we'll create a special CSS rule for the outer DIVs that enclose each of the sub-menu panels. These DIVs have an ID that begins with p7EPMw1, followed by an underscore and a number that represents their order inside the Megavator. The outer wrapper for the first sub-menu panel, therefore, would be p7EPMw1_1. The second would be p7EPMw1_2, and so on.
The Megavator we've built has 3 sub-menu panels, so we'll need to create 3 CSS rules.
Open your Magavator style sheet. In this case p7EPM54.css, which you will find inside the p7epm folder that was created when you built your menu.
Make a new line at the bottom of the file and add these style rules:
#p7EPMw1_1 {
width: 400px;
top: 3px;
left: -4px;
}
#p7EPMw1_2 {
width: 400px;
top: 12px;
left: -4px;
}
#p7EPMw1_3 {
width: 400px;
top: 50px;
left: -4px;
}
Save and close the style sheet file.
Preview in a browser.
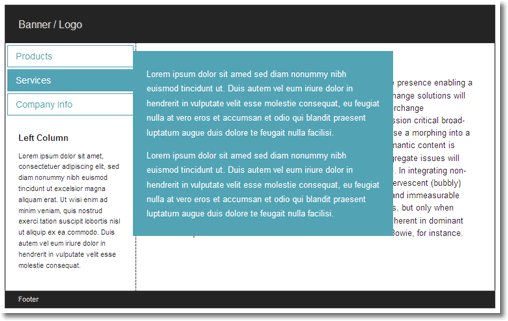
As you can see, you can manipulate the width, the top position, and the left position to get your sub-menus just the way you want them. Depending on content, each can have a different width, as well as different offsets and overlaps.
