Using Auto Generate - Menu Section
This tutorial will demonstrate how to use the Auto Generate system to replace a selected menu item with a generated menu section based on folders and files within your site. The tutorial will use an example folder structure loosely based on projectseven.com. You can follow along using your own site or you can download the Example Site. If you choose to download the example site, unzip the archive and define a new Dreamweaver site using the example site as the site root.
Prepare the Menu Insertion Point
-Open the index.htm page (or your page). Our example page contains placeholder text, "Navigation". This is where the menu will be placed.
-Click on the placeholder text, "Navigation", and then click on the <p> in the Tag Selector bar along the bottom left edge of the Dreamweaver window. This selects the entire paragraph.
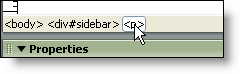
-Click your Delete (Del) key to remove the placeholder text.
Now we have a clean insertion point for the menu.
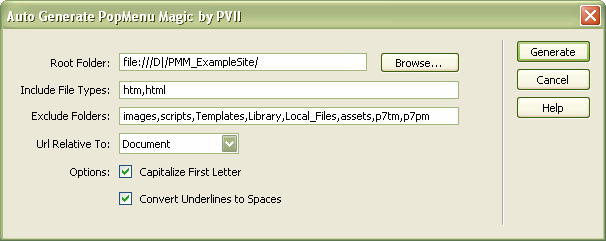
Open the PVII Pop Menu Magic interface
-Click the Pop Menu Magic by PVII icon in the Common category of the Insert Toolbar.

Alternatively, you can use the main Dreamweaver menu by choosing Insert > Studio VII > Pop Menu Magic by PVII. Or Modify > Studio VII > Modify Pop Menu Magic by PVII... if you already have an existing Pop Menu on your page.
-The PVII Pop Menu Magic interface will open.
Select the Menu Item to Auto Generate
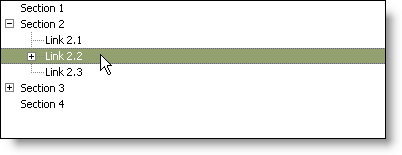
This example will replace Link 2.2 and its child links with generated menu items based on the example site's Products folder.
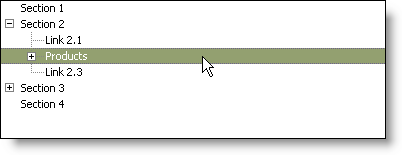
-Click the plus sign (+) to the left of the Section 2 menu item to expand its sub-level.
-Click the Link 2.2 menu item to select it.
Open the Auto Generate Interface
Link 2.2, and all of its sub-levels, will be replaced with generated menu items.
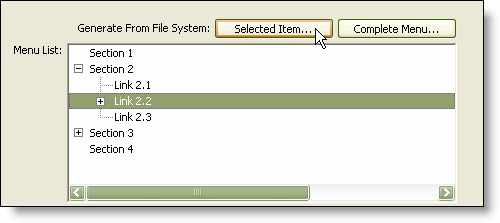
-Click the Selected Item button to open the Auto Generate interface.
-Click the Browse button. The Select the PVII PopMenu Root Folder dialog will open. Navigate to the folder you wish to use as your root. In this example, navigate to the products folder.
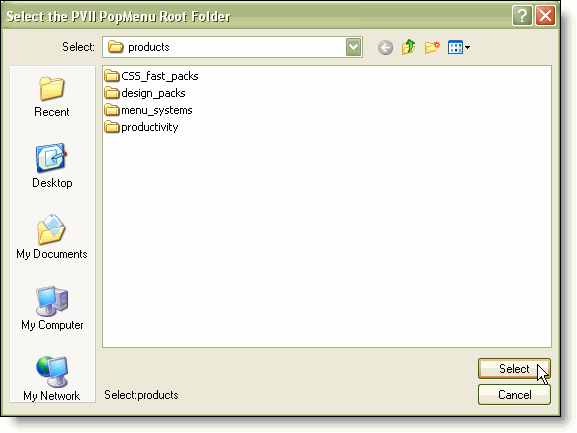
-Click the Select button.
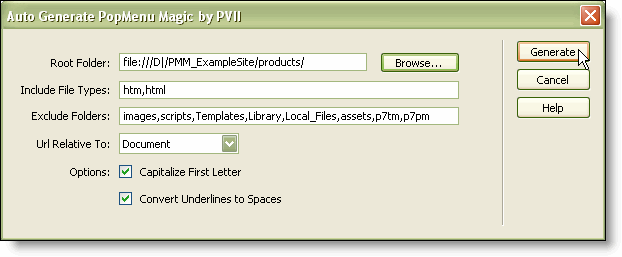
The Root Folder box will now contain the revised path to the root folder.
Generate The Menu
-Click the Generate button to build the generated menu for the selected menu item.
The system will look through all of the folders and files that are within the root folder, filter them based on the options chosen, and generate a menu section. The Auto Generate interface will close and the new menu will appear in the Pop Menu Magic interface. The system replaced the Link 2.2 menu section with a generated Products section.
-Click the plus sign (+) to the left of the Products link to expand the section.
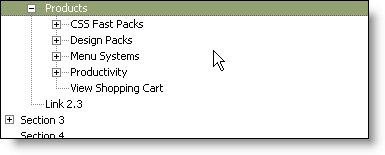
The system has created a sub menu level for each folder - and individual menu items corresponding to each of the pages inside.
In Conclusion
The selected menu item was replaced with a generated section based on a folder within your site file system.
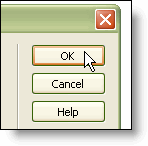
-Click the OK button to add the new menu to your page.
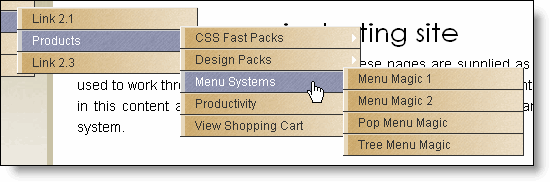
-You can now preview and test the menu (F12).
Next: Home