moving a menu item: part 2
The Pop Menu Magic system allows you to easily add, modify, and delete any of the items in your menu at any time. You can also move existing items, or entire menu sections, at any time using the convenient Grab and Drop feature.
This tutorial will demonstrate a more complex move than one we covered in Part 1. We'll move an entire section, composed of multiple sub-menus, to a new sub-menu in a different section.
About the Grab and Drop feature
Unique to Pop Menu Magic is the ability to Grab (select) a menu item and Drop it into any other position in the menu. This feature replaces "Up and Down" arrows or "Indent and Outdent" controls to create a quicker method for re-ordering your menu.
It's even possible to move entire menu sections (along with their sub-menu levels) to any other section or level of your menu with just a few mouse clicks.
-Open a page that contains a Pop Menu Magic Menu.
Open the PVII Pop Menu Magic interface
-Click the Pop Menu Magic by PVII icon in the Common category of the Insert Toolbar.

-The Modify PVII Pop Menu Magic interface will open.
Prepare the Drop zone
For this exercise we will move the Link 2.2 sub-menu (and all of its sub-menus) to a new sub-menu that we'll create inside Section 4.
Since the Section 4 menu has no existing sub-menu levels, we will create a temporary placeholder sub-menu to act as the insertion point for our Drop.
-Click Section 4 to establish an insertion point.
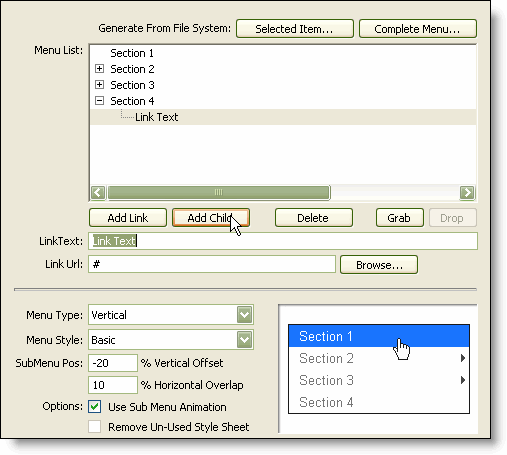
-Click the Add Child button to create a new sub-menu item.
Select the menu item to move
-Click the plus sign (+) next to Section 2 to expand its sub-menu.
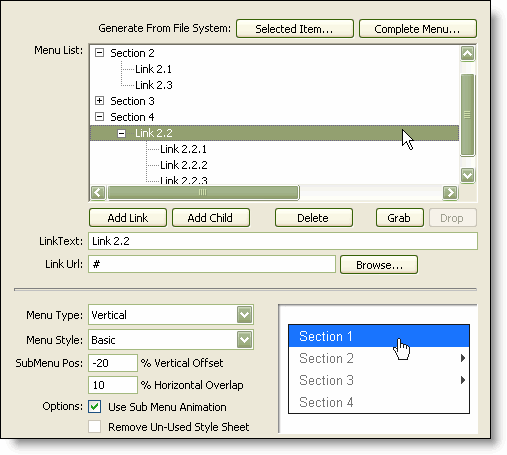
-Click Link 2.2 to select it.
You can expand Link 2.2 to show its sub-levels if you want to - but do note that when we move Link 2.2, its sub-menus will be going along for the trip!
Make the Grab
-Click the Grab button to prepare the currently selected menu item for its move.
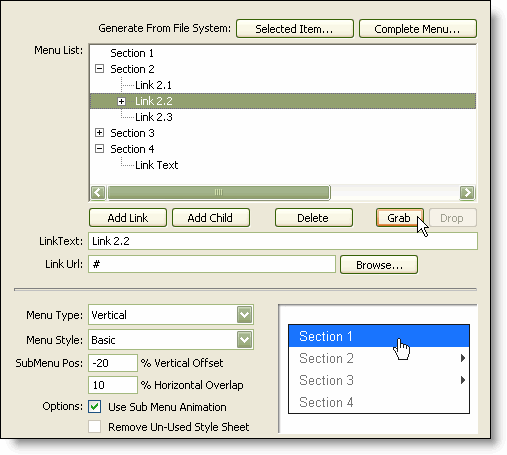
The Drop button will now become active - waiting for you to select the target insertion point.
Note: The Drop button will remain active unless you perform another change operation to the menu, in which case it will deactivate until you select another item to Grab.
Select the Target Position
To set a target position for the Drop, we'll select the menu that we want our Grabbed items to go beneath.
-Click Link Text (the menu item we created earlier), to make it the currently selected menu item.
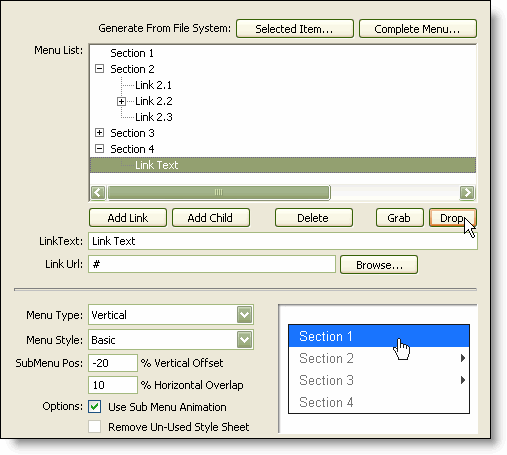
-Click the Drop button to complete the move.
The Link 2.2 menu item, and all of its sub-menu levels, is placed directly beneath the Link Text menu item - our temporary Drop zone.
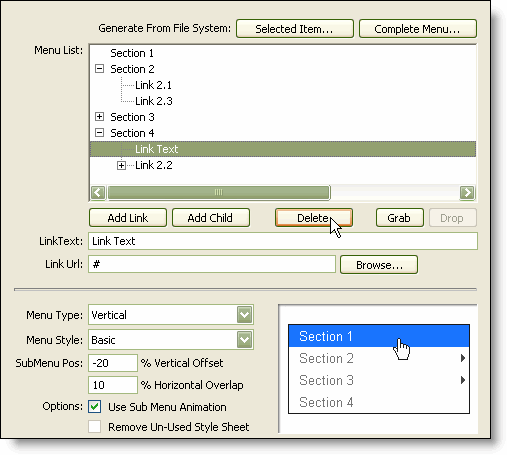
The Drop operation always places the "Grabbed" item(s) on the same (sibling) level and immediately after the selected target.
Remove the temporary Drop zone menu item
-With the Link Text menu item still selected, click the Delete button to remove it. It's served its purpose and is no longer needed.
In Conclusion
We successfully moved one complete sub-menu item inside a new sub-menu level in a different section.
-Click OK to save your changes or you can click Cancel to abort the current editing session.
Next: Home
